
Digital Artisan: Mastering the MultiCam Apex 3R and 3-Axis CNC Machining
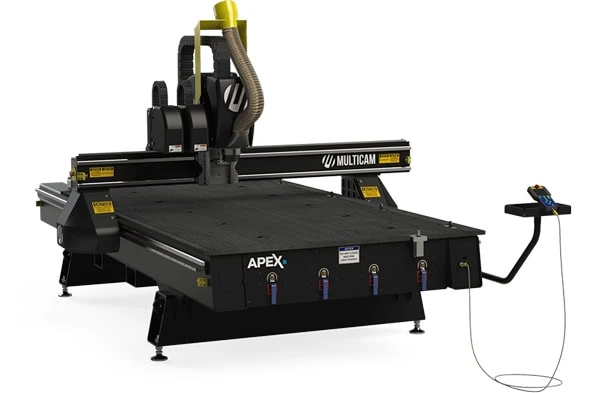
The hum of a spindle, the sharp scent of freshly cut wood, the mesmerizing dance of a tool changer swapping bits with robotic precision—this is the modern symphony of fabrication. At its heart lies the 3-axis Computer Numerical Control (CNC) router, a machine that has democratized the creation of everything from intricate art to industrial parts. The MultiCam Apex 3R, with its robust frame and sophisticated 8-tool automatic tool changer (ATC), is not a hobbyist’s tool; it is a professional production platform. To operate it correctly and efficiently is to bridge the gap between the digital and physical worlds with speed, precision, and repeatability.
This guide is written from the viewpoint of a professional operator, fabricator, or maker. It is a deep dive into the holistic workflow, from the spark of an idea to the final, finished part, with a specific focus on leveraging the capabilities of a machine like the Apex 3R. We will dissect the software ecosystem, master material-specific strategies, and explore a vast landscape of project possibilities. The goal is to transform you from an operator into a “Digital Artisan,” capable of wielding this powerful tool with confidence, efficiency, and professional-grade results.
Part 1: The Philosophy – The Mindset of Efficiency and Precision
Before loading a tool into the collet, the professional cultivates a specific mindset. Efficiency on a CNC is not about raw speed; it is about intelligent process, foresight, and an unyielding respect for the machine’s capabilities and limitations.
- The Infallible Rule: Garbage In, Garbage Out (GIGO). A perfect machine run with a flawed digital file or an incorrect toolpath will produce a flawless flaw. The majority of your time and brainpower should be invested before the “Cycle Start” button is pressed. Meticulous digital preparation prevents catastrophic physical results.
- Think in Operations, Not Just Shapes. A professional doesn’t see a part; they see a sequence of operations. Drilling, pocketing, roughing, finishing, engraving. The Apex 3R’s 8-tool ATC is your greatest asset for efficiency. Plan your job to minimize tool changes and machine pauses. Group all operations for Tool 1 across the entire bed, then Tool 2, and so on.
- Safety is the Baseline, Not an Option. A CNC router is a powerful, unforgiving machine. It throws chips, creates dust, and rotates sharp tools at speeds capable of causing severe injury. Professionalism means that safety protocols—safety glasses, hearing protection, dust collection, and never leaving a running machine unattended—are as automatic as breathing.
- Know Thy Material. Machining 6061 aluminum is fundamentally different from machining PVC or Brazilian Cherry. Understanding material properties—hardness, chip formation, thermal sensitivity, and grain structure—is the key to selecting the right tools, feeds, speeds, and strategies. This knowledge is what separates a professional from an amateur.
Part 2: The Digital Foundation – The Software Ecosystem
The journey of a physical part is a digital one. The software chain, from design to machine movement, is the central nervous system of the operation.
- Computer-Aided Design (CAD) – The Blueprint
CAD software is for creating the 2D vector or 3D model of the part.
- Vectric VCarve Pro / Aspire ($$ – $$$)
- Primary Use: 2.5D Design & CAM. While it has powerful CAM capabilities, its design environment is incredibly intuitive for vector-based and 2.5D (profiles, pockets, and carves with limited Z-depth) work.
- Ease of Use: Excellent. Arguably the most user-friendly in its class, with a shallow learning curve for basic tasks and deep functionality for advanced ones.
- 2D vs. 3D: Master of 2.5D. Aspire adds true 3D modeling sculpting capabilities, but it’s best suited for decorative modeling, not complex mechanical design.
- Professional Verdict: The gold standard for sign shops, woodworkers, and decorative fabricators. Its integration with its own CAM software is seamless. For the Apex 3R owner doing mostly 2.5D work, VCarve Pro is often the perfect sweet spot.
- Autodesk Fusion 360 ($$ – Subscription)
- Primary Use: Parametric 3D CAD & Integrated CAM.
- Ease of Use: Moderate to Steep Learning Curve. It’s a fully-featured parametric modeler, which is powerful but more complex than direct modelers.
- 2D vs. 3D: Excellent at both. It can create detailed 2D drawings from 3D models and is unparalleled for designing complex, functional 3D parts with precise dimensions and relationships.
- Professional Verdict: The dominant choice for engineers, product designers, and anyone creating functional parts. Its integrated CAM platform is exceptionally powerful and perfectly suited for leveraging an ATC. If your work involves bolts, bearings, and assemblies, Fusion 360 is indispensable.
- Rhinoceros 3D (Rhino) ($$$)
- Primary Use: Freeform NURBS Modeling.
- Ease of Use: Moderate. Its logic is different from parametric modelers but is often considered more intuitive for organic, sculptural forms.
- 2D vs. 3D: Excellent at both, but its superpower is complex, smooth, organic 3D surfaces (like those used in jewelry, furniture, and automotive design).
- Professional Verdict: The tool of choice for architects, sculptors, and jewelers. It requires a separate CAM plugin (like RhinoCAM) but offers unparalleled control over complex 3D geometry.
- Adobe Illustrator ($$ – Subscription)
- Primary Use: 2D Vector Graphic Design.
- Ease of Use: Good for designers, less so for engineers. The industry standard for graphic design.
- 2D vs. 3D: Purely 2D.
- Professional Verdict: Excellent for importing logos and complex vector art for engraving or cutting. It is not a CAD program, so it lacks precision dimensioning for mechanical parts. It’s a specialist tool in the CNC workflow, best used for asset creation before bringing into VCarve or Fusion.
- Computer-Aided Manufacturing (CAM) – The Translator
CAM software takes the CAD model and translates it into the toolpaths and G-code that the CNC machine understands.
- Vectric VCarve Pro / Aspire CAM
- Integration: Seamless with its own CAD environment.
- Strengths: Unbelievably intuitive for 2.5D toolpaths (profile, pocket, v-carve). The preview is superb and easy for clients to understand. Excellent for nested-based production.
- ATC Workflow: Good. It easily handles multiple tools and posts processors for MultiCam machines.
- Autodesk Fusion 360 CAM
- Integration: Fully integrated with Fusion 360 CAD.
- Strengths: Unmatched power for 3D toolpaths (adaptive clearing, scallop finishing), 4th-axis programming, and sophisticated strategies for hard materials. Its “adaptive” toolpaths are genius, maintaining a constant tool load for longer life and faster cutting.
- ATC Workflow: Excellent. It is built around the concept of tool libraries and setup sheets, making ATC management straightforward.
- Siemens NX CAM / Mastercam ($$$$)
- Integration: High-end, standalone CAM systems that import CAD files.
- Strengths: Used for programming complex, 5-axis aerospace and automotive parts. Overkill for 99% of 3-axis router work but represents the pinnacle of CAM technology.
- Professional Verdict: For a shop running an Apex 3R that also does prototype work for aerospace or medical, this might be relevant. For most, Fusion 360 is more than capable.
The Professional Software Stack:
- For Signmaking, Woodworking, & Decorative Arts: Vectric VCarve Pro/Aspire. Its all-in-one nature and ease of use are unbeatable for this field.
- For Engineering, Product Design, & Functional Parts: Autodesk Fusion 360. Its parametric CAD and powerful, integrated CAM are a perfect, professional-grade combination.
- For Sculptural & Organic Art: Rhinoceros 3D + RhinoCAM. This pairing offers the ultimate creative freedom for complex 3D forms.
Part 3: The Material Palette – Strategies for Every Substance
The Apex 3R is a versatile machine, but success depends on treating each material family according to its unique properties.
- Wood & Wood Composites
- General Strategy: Wood is fibrous and can tear out. Use sharp, dedicated wood-cutting tools (often with fewer flutes for better chip evacuation). Climb cutting (where the tool moves with the rotation) produces a cleaner top-edge finish on most woods, while conventional cutting can be better for preventing tear-out on the bottom edge.
- Softwoods (Pine, Cedar):
- Tools: 2 or 3-flute up-cut spiral end mills. The up-cut pulls chips out, preventing re-cutting and burning.
- Feeds/Speeds: Aggressive feeds are possible. High RPM with moderate to high feed rates.
- Hold-Down: Vacuum table is ideal. Otherwise, tabs or strategic screw placement.
- Hardwoods (Maple, Oak, Walnut):
- Tools: 2 or 3-flute up-cut spirals for roughing. Down-cut spirals for finishing passes on the top surface, as they push the fibers down, giving a laser-sharp edge. Compression spirals (up-cut on the bottom, down-cut on the top) are the professional’s choice for through-cuts in plywood and laminated materials.
- Feeds/Speeds: Slower feeds and speeds than softwoods. Requires more power. Let the tool’s sharpness do the work.
- Plywood & MDF:
- Tools: Compression end mills are king. They cleanly shear the top and bottom veneers of plywood and prevent fuzzing on MDF.
- Feeds/Speeds: Similar to softwoods for MDF, but be mindful of the abrasive glue in plywood which will dull tools faster.
- Plastics & Acrylics
- General Strategy: The enemy is heat. Melting plastic will weld chips back to the part, creating a rough finish and potentially jamming the tool.
- Acrylic (PMMA):
- Tools: Single or 2-flute O-flute (spiral flute) end mills are specifically designed for plastics. Their large gullets evacuate chips quickly, and their geometry shears rather than melts the material.
- Feeds/Speeds: High RPM, slow to moderate feed rates. Use an air blast (or the machine’s air solenoid) to blow chips away and cool the cut. Never use a vacuum on acrylic chips, as they are highly combustible.
- Result: With the right tool and strategy, you can achieve a “fire-polished” edge directly from the machine.
- PVC & Polycarbonate:
- Tools: Similar O-flute end mills.
- Feeds/Speeds: PVC is softer and gummier. Polycarbonate is tough. Both require sharp tools and good chip evacuation.
- HDPE & UHMW (Polyethylene):
- Tools: O-flute or sharp 2-flute end mills.
- Strategy: These materials are very soft and flexible. They require very sharp tools and secure hold-down to prevent the material from flexing and grabbing the tool.
- Foams
- General Strategy: Foams are soft and easy to cut but can be dusty and lack structural integrity.
- EPS & XPS (Styrofoam):
- Tools: Hot wire cutting is best, but for 3D carving, use specialized “foam-cutting” bits which have large, widely spaced flutes. Standard end mills will overheat and melt the foam.
- Use: Primarily for prototyping, packaging, and large-scale sculptural forms for props and themed environments.
- Polyurethane & Tooling Board (e.g., Renshape, Precision Board):
- Tools: 2 or 3-flute end mills with a sharp cutting angle. Ball-nose end mills for 3D finishing.
- Strategy: These dense foams machine beautifully, producing fine chips and holding incredible detail. They are the professional’s choice for creating master patterns for molding, architectural millwork, and high-fidelity sculptures.
- Non-Ferrous Metals
- General Strategy: This is where the Apex 3R’s rigidity is tested. Use conservative depths of cut, high feed rates, and the correct lubrication/cooling. The goal is to make a chip that carries heat away, not a fine dust that heats the tool and workpiece.
- Aluminum (6061, 7075):
- Tools: 2 or 3-flute carbide end mills specifically for aluminum. They have a high helix angle and polished flutes to prevent material from sticking.
- Feeds/Speeds: High RPM, High Feed Rate. This is counter-intuitive but critical. A slow feed rate allows the tool to rub and generate heat. A “chipload” of 0.001-0.005 inches per tooth is a good starting point. Use a mist coolant system or an air blast with a lubricant (like WD-40) to prevent chip welding.
- Toolpaths: Use Fusion 360’s Adaptive Clearing (or similar “trochoidal” toolpaths). These keep the tool engaged in the material with a constant load, avoiding sharp corners that can break tools, and efficiently removing material.
- Brass & Copper:
- Tools: Similar to aluminum. Brass is generally easier to machine (free-machining).
- Feeds/Speeds: Softer than aluminum but still requires good chip evacuation. Can be run dry or with a light air blast.
Part 4: The Professional Workflow – From File to Finished Part
Using the Apex 3R’s ATC efficiently requires a disciplined, step-by-step process.
Phase 1: Digital Preparation & CAM
- Model Finalization: Ensure your CAD model is “watertight” and properly scaled.
- CAM Setup:
- Define Stock: Precisely set the dimensions of your material block in the CAM software.
- Create Tool Library: This is the heart of ATC efficiency. Create a library in your CAM software with all your tools. For each tool, define: Tool Number (T1, T2, etc.), Description, Diameter, Flute Length, Overall Length, and most importantly, Feeds and Speeds. The Apex 3R will use this number to call the tool.
- Generate Toolpaths: Plan your operations logically.
- Tool 1 (T1): 1/4″ End Mill – Roughing pass for the entire part.
- Tool 2 (T2): 1/8″ Ball Nose – 3D Finish pass.
- Tool 3 (T3): 90° V-Bit – Engraving text.
- Tool 4 (T4): 1/4″ Drill Bit – Drilling mounting holes.
- Simulate: Always, always, always run the full simulation. Check for collisions, ensure the tool lengths are correct, and verify that all material is removed correctly.
Phase 2: Machine Setup
- Material Securement: This is critical. Use a vacuum table, clamps, or double-sided tape. For the ATC, ensure no clamps interfere with the tool changer’s path.
- Work Coordinate System (WCS): Precisely set the X, Y, and Z zero points for your job. On the Apex 3R, this is typically done with a touch-off probe or manually with a precision tool setter. This tells the machine where the stock is in its physical space.
- Tool Height Offsets: For an ATC, you must measure the length of every tool you will use and store that value in the machine’s controller (e.g., as H1, H2, H3 corresponding to T1, T2, T3). This tells the machine the precise length of each tool so it can accurately position the tip in the Z-axis.
Phase 3: Running the Job
- Dry Run: Run the first few lines of code with the Z-axis raised above the material to ensure the machine moves as expected and the ATC selects the correct tools.
- Cycle Start: Initiate the program. The machine will now run autonomously.
- T1 Load: The spindle will move to the tool change position, the carousel will rotate, and T1 will be loaded.
- Roughing: The machine performs all roughing operations across the bed.
- T1 Unload / T2 Load: The machine returns to the tool change position, swaps T1 for T2, and resumes the finishing pass.
- This continues until the program ends with an M30 command.
- Monitoring: A professional never leaves a running machine unattended, especially during the first run of a new program. Listen to the sound of the cut—it should be a consistent, smooth hum, not a screech or a labored groan.
Phase 4: Post-Processing
Once the machine is finished, parts often require de-burring, sanding, assembly, or finishing (painting, staining, etc.).
Part 5: The Project Gallery – From Concept to Creation
Here are specific, unique project examples tailored to different materials, showcasing the Apex 3R’s versatility.
- Wood Projects
- Intricate Inlaid Chessboard: Using a down-cut bit for the pockets and a compression bit for the through-cuts, machine pockets into a maple board and corresponding inserts from walnut. The precision of the CNC allows for a perfect press-fit.
- Custom Dovetailed Joinery for a Toolbox: Program the machine to cut through dovetails on the ends of boards. This combines traditional woodworking strength with digital precision and repeatability.
- 3D Topographic Wall Art: Import GIS data or a 3D model of a mountain range. Use a roughing and finishing ball-nose toolpath to carve the layered contours into a slab of cedar, creating a stunning, textured landscape.
- Architectural Corbels & Brackets: Create complex, decorative brackets for shelving or mantels that would be impossibly time-consuming to carve by hand.
- Precision Guitar Body & Neck: The holy grail for luthiers. Machine the entire body, neck, and even the fretboard, including cavities for pickups and electronics.
- Plastic & Acrylic Projects
- Custom Illuminated Sign with Integrated Light Pipes: Machine a two-layer sign from opaque and translucent acrylic. The top layer has engraved letters, and the bottom layer has pockets to press-fit LEDs, creating a professional, evenly lit sign.
- Precision Gears and Mechanism for a Prototype: Machine functional gears, linkages, and housings from Delrin (acetal), a low-friction engineering plastic, for custom machinery or robotics.
- Museum-Grade Display Stands: Create clear acrylic stands with precisely machined contours to hold artifacts or products, appearing almost invisible.
- Custom Enclosures for Electronics: Design and machine a ventilated, professional-looking case for a custom circuit board, complete with holes for switches, ports, and screws.
- Multi-Layer Lens for a Light Fixture: Machine a series of acrylic discs with different optical textures (lenses, prisms) and stack them to create a unique lighting effect.
- Foam Projects
- Large-Scale Thematic Sculpture (Dragon, Robot): 3D carve a massive form from stacked XPS foam blocks. The piece can then be sealed, detailed, and painted for a theme park or stage production.
- Lost-Foam Casting Pattern for Metal: Machine a detailed pattern from specialized casting foam. Pack it in sand, then pour molten metal, which vaporizes the foam and fills the cavity, creating a complex metal part.
- Custom Packaging Inserts for High-Value Products: Machine a perfect-fit cavity in foam to securely hold a delicate product like a camera or scientific instrument inside a case.
- Architectural Molding Master: Carve a complex crown molding or ceiling medallion from the tooling board. Use this master to create a silicone mold for reproducing the part in polyurethane or plaster.
- Terrain Board for Wargaming: Machine a 4’x8′ board with detailed landscapes—hills, rivers, roads—from EPS foam for a hyper-realistic gaming table.
- Non-Ferrous Metal Projects
- Aerospace Drone Frame: Machine a lightweight, high-strength frame from a solid block of 6061 aluminum. The ATC allows for efficient roughing with a larger tool and precise finishing of bearing seats with a smaller tool.
- Custom Aluminum Speaker Grilles: Create a complex, perforated pattern in a thin aluminum sheet for a high-end audio product.
- Artistic Wall Panels from Textured Copper: Use a V-bit to engrave intricate, swirling patterns into a copper sheet, which can then be allowed to patina naturally.
- Precision Jigs and Fixtures for a Workshop: Machine drill guides, router templates, and assembly jigs from aluminum or brass. Their durability and accuracy will improve all other workshop operations.
- Custom Knuckle for a Robotic Arm: Machine a complex, load-bearing component from 7075 aluminum, with precisely bored holes for bearings and complex 3D contours for strength and weight reduction.
Conclusion: The Synthesis of Digital and Physical
Mastering a machine like the MultiCam Apex 3R is a journey of continuous learning. It demands the logical mind of an engineer, the creative eye of a designer, and the disciplined hands of a craftsperson. It is about understanding that the machine is not a magic box, but a faithful executor of your digital intent.
The professional Digital Artisan thrives at this intersection. They know that the true power of the ATC isn’t just convenience; it’s the ability to create complex, refined parts in a single, uninterrupted cycle. They respect the unique dialogue between tool and material, whether it’s the shearing of aluminum or the carving of walnut. By embracing the holistic workflow—from meticulous digital design in software like Fusion 360 or VCarve, through disciplined machine setup, to intelligent toolpath strategy—you unlock the full potential of this remarkable technology.
You become capable of not just making things, but of innovating, prototyping, and producing work of unparalleled quality and complexity, bridging the gap between the abstract world of data and the tangible world of objects.