Forging the Vision: A Professional’s Guide to Artistic Metal Fabrication
Metal is the elemental medium. It is the bones of our civilization, the skin of our machines, and one of the most demanding, yet rewarding, materials an artist can master. To shape metal is to engage in a dialogue with the fundamental forces of the earth—heat, pressure, and sheer human will. Custom metalwork and fabrication for artistic purposes is not merely construction; it is an alchemical process of transforming raw, industrial material into objects of profound beauty, emotion, and meaning.
This guide is written from the viewpoint of a professional fabricator and artist. It is not a casual DIY primer but a deep dive into the philosophy, tools, materials, and processes required to work with metal correctly, safely, and efficiently. We will move beyond basic joins to explore how to make metal express, flow, and capture light. Whether your goal is to create monumental public sculptures, intricate jewelry, custom furniture, or avant-garde props, the principles remain the same: a marriage of disciplined technique and unbridled creativity.
Part 1: The Foundation – The Mindset of a Metal Artist
Before striking an arc or lighting a torch, the professional cultivates a specific mindset. Efficiency in the metal shop is not about haste; it is about precision, foresight, and a respectful understanding of the material’s nature.
- Design with the Material in Mind: The most successful metal art is conceived for metal. It understands and celebrates properties like strength, malleability, and the ability to be joined. A design that fights the nature of metal will be a constant struggle.
- Safety as the First and Constant Step: A metal shop is a symphony of potential hazards: blinding light, searing heat, sharp edges, and deafening noise. Professionalism means that safety protocols—Personal Protective Equipment (PPE), ventilation, and shop organization—are non-negotiable, ingrained habits. Your first creation in any shop should be a safe working environment.
- The Infallible Rule: Measure Twice, Cut Once (and Plan Thrice): Metal is unforgiving of errors. A mis-cut piece of expensive steel plate or a warped weldment cannot be undone. Time spent in meticulous planning, template-making, and sequencing saves not only material but hours of corrective grinding and fabrication.
- Embrace the Process, Not Just the Product: Metalworking is a journey of processes: cutting, shaping, joining, finishing. A professional finds the artistry in each step. The gleam of a perfectly laid weld bead, the smooth curve of a hand-formed sheet, the evolving texture of a surface under the grinder—these are all part of the final piece’s story.
Part 2: The Arsenal – Tools of the Trade
A professional shop is a collection of specialized tools, each serving a distinct purpose in the transformation of metal. Investment in good tools is an investment in capability, efficiency, and final quality.
- Essential Safety Gear (The Non-Negotiables)
- Eye Protection: Safety glasses for all shop work. A welding helmet with an auto-darkening filter for welding and cutting. A full-face shield for heavy grinding.
- Hearing Protection: Earplugs and/or earmuffs. Plasma cutting, grinding, and hammering generate harmful noise levels.
- Respiratory Protection: N95 masks for grinding dust. A respirator with vapor/particle cartridges for welding fumes, painting, and chemical application.
- Hand and Body Protection: Heavy-duty, cuffless leather gloves for welding and handling hot metal. MIG welding gloves. Heat-resistant aprons and jackets. Sturdy, steel-toed boots.
- Measurement and Layout – The Blueprint for Precision
- Tape Measure & Rule: A reliable, high-quality 25-foot tape and a rigid 12-inch rule for small work.
- Combination Square: Perhaps the most important layout tool. Used for marking 90° and 45° angles, checking for square, and setting consistent measurements.
- Soapstone, Scribers, & Punches: Soapstone for marking on rough metal. Scribers for fine, permanent lines. Center punches to mark hole centers and start drill bits.
- Caliper: Digital or dial calipers for precise measurement of thickness, hole diameters, and small details.
- Cutting and Shearing – Dividing the Whole
- Angle Grinder with Cut-Off Wheels: The ubiquitous tool for quick cuts, notching, and demolition. Versatile but can be imprecise and creates a rough edge.
- Chop Saw (Abrasive or Cold Saw): For fast, straight cuts on bar stock and tubing. Abrasive saws are common but create heat and a burred edge. Cold saws use a toothed blade for a cleaner, cooler cut.
- Band Saw (Portable or Vertical): The professional’s choice for accurate, clean, and controllable cuts. A vertical band saw can follow complex curves in sheet metal, while a portable bandsaw (like a “portaband”) is indispensable for cutting stock to length.
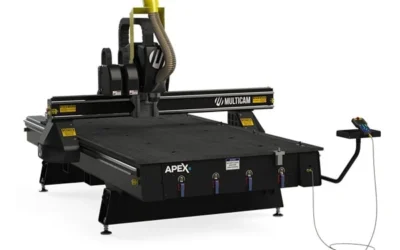
- Plasma Cutter: Uses electrically ionized gas (plasma) to melt and blow through metal. It is fast, can cut any electrically conductive metal, and, with a guide, can produce very precise shapes from plate steel. It is the key tool for creating intricate 2D forms for sculpture.
- Oxy-Fuel Torch: The classic method for cutting thick steel. Slower than plasma but requires no electricity and is excellent for rough demolition or heating metal for bending.
- Shaping and Forming – Persuading the Metal
- Hammers and Mallets: A vast family of tools. Ball-peen hammers, cross-peen hammers, raising hammers, and planishing hammers are used for forging, shaping, and smoothing metal over various stakes and anvils.
- Anvil and Stakes: The anvil is the foundational forming surface. Stakes are specialized forms that fit into an anvil’s hardy hole, providing shapes over which to bend and form sheet metal.
- English Wheel: A machine consisting of two steel wheels (one flat, one crowned) between which sheet metal is passed. It is used to create complex compound curves, to smooth out hammer marks, and to shape automotive panels and organic sculpture forms.
- Brake (Box and Pan Brake): A tool for making precise, straight bends in sheet metal. A box and pan brake has removable fingers that allow for forming boxes and pans by bending up the sides.
- Roller (Slip Roll or Pyramid Roll): Used to curve sheet metal into cylinders or gentle arcs. A slip roll is for lighter gauge sheet, while a pyramid roll can handle plates.
- Joining – Uniting the Pieces
- Welding Power Sources:
- MIG (Metal Inert Gas) / GMAW (Gas Metal Arc Welding): The “hot glue gun” of the welding world. Uses a wire feeder to continuously feed a consumable electrode. It is fast, relatively easy to learn, and excellent for fabrication on steel and aluminum. The professional’s choice for strong, efficient joins on a wide range of thicknesses.
- TIG (Tungsten Inert Gas) / GTAW (Gas Tungsten Arc Welding): The “scalpel.” Uses a non-consumable tungsten electrode to create an arc, and filler rod is added separately. It offers unparalleled control over heat and the weld puddle. It is the standard for high-quality, clean, and beautiful welds on stainless steel, aluminum, and thin materials. Essential for sculpture where the weld may be part of the aesthetic.
- SMAW (Shielded Metal Arc Welding) / “Stick”: A rugged, portable process using a flux-coated consumable electrode. Excellent for heavy steel, construction, and outdoor work, but produces more spatter and slag than MIG or TIG.
- Oxy-Acetylene Welding & Brazing: Uses a flame from burning oxygen and acetylene. It is versatile for welding, brazing (joining with a brass-based filler), soldering, and heating metal for bending. It is slower than arc welding but offers a soft, controllable heat source.
- Finishing – Refining the Surface
- Angle Grinders (again): Fitted with flap discs for smoothing, grinding discs for aggressive material removal, and wire wheels for cleaning.
- Belt Grinders and Sanders: For sharpening tools, deburring edges, and creating flat, smooth surfaces.
- Files (Bastard, Second-Cut, Smooth): For hand-finishing, deburring holes, and fitting parts with precision.
- Polishing Tools: Bench grinders with buffing wheels and various compounds (tripoli, white rouge) to achieve a mirror finish.
Part 3: The Palette – Understanding the Metals
An artist must know their palette. Each metal and alloy has a unique personality, offering different strengths, weaknesses, and aesthetic possibilities.
- Low Carbon Steel (Mild Steel): The workhorse of the fabrication world.
- Properties: Strong, malleable, easy to weld and form. It is inexpensive and widely available.
- Aesthetic: Its primary drawback is that it rusts quickly unless protected. However, this can be used artistically. It can be finished with a “clear” coat that allows a controlled rust patina to show through, or it can be left to weather naturally for a rustic look. It takes paint well.
- Artistic Uses: Structural sculptures, furniture frames, architectural elements, and as a base for other finishes.
- Stainless Steel: The sophisticated choice.
- Properties: An alloy of steel with chromium (at least 10.5%), which forms a passive, self-healing oxide layer that prevents rust. It is strong, harder to form than mild steel, and requires specific techniques to weld correctly (typically TIG).
- Aesthetic: Can range from a satin brush finish to a mirror polish. It maintains its appearance outdoors with minimal maintenance. It can be etched or electro-chemically colored.
- Artistic Uses: High-end sculpture, architectural features, jewelry, kitchenware, and any application where corrosion resistance and a modern, clean look are desired.
- Aluminum: The lightweight.
- Properties: Lightweight, corrosion-resistant, highly conductive, and non-magnetic. It has a lower melting point than steel and is very soft in its pure forms. It is challenging to weld as it conducts heat very quickly and forms a refractory oxide layer that must be broken through (requiring AC TIG welding).
- Aesthetic: Can be polished to a brilliant, silvery shine, brushed to a soft matte finish, or anodized to create a hard, durable surface in a vast array of colors.
- Artistic Uses: Large-scale sculptures where weight is a concern, automotive and aerospace-themed art, modern furniture, and lighting.
- Copper: The warm and malleable.
- Properties: Extremely ductile and malleable, with excellent thermal and electrical conductivity. It work-hardens, meaning it becomes stiffer as it is hammered or bent, and must be annealed (heated to a dull red and quenched) to restore softness.
- Aesthetic: Known for its distinctive warm, reddish-brown color. It develops a green patina (verdigris) over time when exposed to the elements, a look often desired in architectural sculpture.
- Artistic Uses: Repoussé and chasing (shallow relief sculpture), roofing, decorative accents, and jewelry.
- Brass: The golden classic.
- Properties: An alloy of copper and zinc. It is harder than copper but still very workable. It machines beautifully.
- Aesthetic: A warm, gold-like appearance. It tarnishes to a darker brown but does not develop a green patina like copper. It is often lacquered to preserve its shine.
- Artistic Uses: Decorative hardware, musical instruments, sculpture, and maritime fixtures.
- Bronze: The sculptor’s heritage.
- Properties: Primarily an alloy of copper and tin. It is harder and more durable than brass. It has a low friction coefficient against other metals.
- Aesthetic: A rich, brownish-gold color that develops a noble, brownish-green patina over time. It is the traditional metal for cast sculpture.
- Artistic Uses: Primarily for casting using the lost-wax method, but also available in sheet and rod form for fabrication. It is the classic material for monumental statuary.
Part 4: The Process – A Professional Workflow from Concept to Completion
Let’s follow the creation of a specific project: a wall-mounted sculptural sconce, combining a plasma-cut steel silhouette with a hand-formed, hammered copper shade.
Phase 1: Design and Engineering
- Concept Sketching: Begin with loose sketches to establish form and function. How will the light be diffused? How will it attach to the wall? How will the electrical components be housed?
- Technical Drawing: Translate the sketch into a precise technical drawing. This can be done by hand but is now most efficiently done with CAD (Computer-Aided Design) software like Fusion 360 or SketchUp.
- For the steel silhouette, create a 2D vector drawing (DXF file) that will be sent to the plasma cutter.
- For the copper shade, develop a layout or “flat pattern” that shows the shape of the sheet metal before it is formed.
- Material Selection: Based on the design, select the appropriate metals. For our sconce: 1/8″ thick mild steel for the structural bracket and silhouette, and 20-gauge copper sheet for the shade.
Phase 2: Fabrication – Cutting, Forming, and Preparing
- Cutting the Steel Bracket:
- Process: The DXF file is loaded into the plasma cutter’s computer. A sheet of 1/8″ mild steel is placed on the cutting table. The plasma torch follows the digital path, precisely cutting the intricate silhouette and the bracket in one operation.
- Professional Touch: After cutting, the “dross” (re-solidified molten metal on the bottom edge) is removed with a grinder or a file, leaving a clean edge.
- Forming the Copper Shade:
- Process: The flat pattern for the shade is transferred to the copper sheet using a scribe. It is then cut out with tin snips or a nibbler. The edges are filed smooth.
- Shaping: The flat copper shape is annealed with a torch to soften it. It is then placed over a sandbag or a dishing stump and gently hammered with a rounded, ball-peen hammer to create a shallow, organic dish shape. The goal is not perfection, but a hand-hammered texture that will catch the light.
- Planishing: To smooth out the major hammer marks and create a more uniform curve, the piece may be lightly planished on a polished steel stake with a polished planishing hammer.
Phase 3: Joining – The Art of the Permanent Connection
- Tack Welding the Steel:
- Process: All steel parts are cleaned with a wire brush to remove mill scale and rust. The bracket and silhouette are clamped securely in a welding jig to ensure perfect alignment.
- Welding: Using a MIG welder, the fabricator makes small “tack” welds at key points to lock the assembly together. They then complete the welds, moving around the piece to minimize heat distortion. For a piece like this, where the welds might be visible, they would be ground smooth and flush for a seamless look.
- Joining the Copper Shade:
- Process: The copper shade is not welded to the steel. Instead, mechanical connections are used. Holes are drilled in the steel bracket, and corresponding holes are punched in the copper. The two are joined using rivets, which become a decorative feature.
- Professional Method: The rivets are installed with a rivet gun or hammered over by hand, ensuring a tight, rattle-free fit.
Phase 4: Finishing – The Revelation of the Final Surface
This is where the piece truly comes to life and the artist’s intent is fully realized.
- Surface Preparation:
- Steel: The entire steel assembly is sanded with a progression of grits on an angle grinder, starting with 80-grit flap disc to remove weld discoloration and ending with 120-grit to achieve a uniform, satin finish.
- Copper: The hammered copper is cleaned with a commercial copper cleaner or a paste of lemon juice and salt to remove oxidation and bring out its bright, warm color.
- Applying the Finish:
- Steel: To prevent rust while allowing the metal to be visible, a clear coat is applied. The steel is first treated with a metal conditioner (like Ospho) which converts the surface iron oxide to a stable, black iron phosphate. Once dry, several light coats of a clear, matte spray lacquer or a clear, hard-wearing automotive two-part epoxy are applied.
- Copper: To preserve the bright, shiny finish, the copper is coated with a clear lacquer formulated for metals. To achieve an antique look, the copper could be treated with liver of sulfur to darken it, and then the high points are polished back, leaving the recesses dark—a technique called “antiquing.”
- Final Assembly: The electrical components—socket, wiring, and strain relief—are installed. The sconce is packaged carefully to prevent damage to the finish during shipping or installation.
Part 5: Advanced Artistic Applications and Techniques
- Project: Large-Scale Abstract Sculpture.
- Challenge: Structural integrity, assembly of large components, and surface finish on a monumental scale.
- Solution: The sculpture is engineered in sections, often with an internal armature. Thick plate steel is cut with a plasma or oxy-fuel torch. Joins are heavy MIG or Stick welds, which are often left visible as a testament to the fabrication process. The finish might be a weathered, controlled rust patina achieved with chemicals, or a durable industrial paint applied with an airless sprayer.
- Project: Fine Art Jewelry.
- Challenge: Minute detail, precious materials, and flawless finishes.
- Solution: The tools are smaller but the principles are the same. A jeweler’s saw is used for intricate cutting. A micro-torch is used for soldering with hard and soft solders. Forming is done with tiny hammers and stakes. Finishing involves progressively finer abrasives and polishing with specialized compounds on felt bobs. Techniques like Keum-Boo (the bonding of thin gold foil to silver through heat and pressure) can be used for accent.
- Project: Custom Furniture (e.g., a Steel and Wood Table).
- Challenge: Integrating disparate materials, achieving precise fits, and ensuring stability.
- Solution: The steel frame is meticulously fabricated and welded, with allowances for wood movement. TIG welding is often used for its clean, controllable welds that require minimal finishing. The connection between wood and metal is often mechanical (e.g., bolts in slotted holes) to allow for expansion and contraction. The steel might be powder-coated for an extremely durable, uniform finish.
Conclusion: The Synthesis of Craft and Vision
Artistic metal fabrication is a demanding but profoundly rewarding discipline. It requires the strength of a blacksmith, the precision of a machinist, the eye of a sculptor, and the patience of a monk. It is a continuous dialogue between the unyielding nature of the material and the creative will of the artist.
The professional metal artist is not just a user of tools; they are a master of process. They understand that the gleam of a perfect polish, the texture of a hammered surface, and the honesty of a visible weld are all part of the visual language of metal. By internalizing the principles of safety, planning, material science, and disciplined technique, you move beyond simply making things out of metal. You learn to speak its language, to collaborate with it, and ultimately, to forge your vision into enduring, tangible reality.